Wumple.com

2019/10/22

Support Texas parks – vote Yes for Prop. 5 on Nov. 5th!

Filed under: — Stormwind @ 11:27 am

(For my Texas friends:) Support Texas parks and nature: Vote Yes on Prop. 5 on Nov 5th!

From 1993 to 2017, the state has collected nearly $2.5 billion in revenues from the Sporting Goods Sales Tax that was supposed to go to parks, yet only 40 percent has been spent on state and local parks. Prop. 5 will prevent those funds from being diverted every year.

For more info, see the Texas Coalition for State Parks .

2019/06/26

Build a Network PoE Speaker System

Filed under: — Stormwind @ 5:33 pm

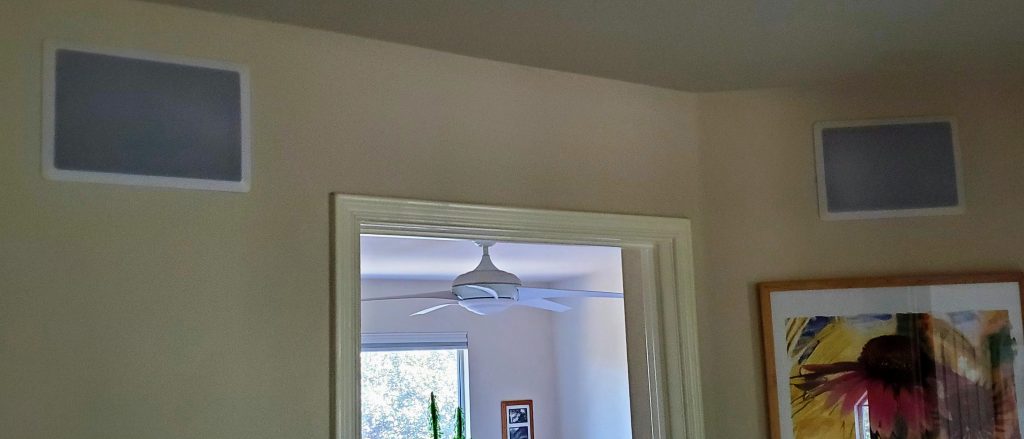
I recently built a networked PoE (Power over Ethernet) speaker system and installed it in the wall at the top of the stairs. By using PoE, I only had to run one cable to the device – a Cat6A ethernet cable that provided data and power.

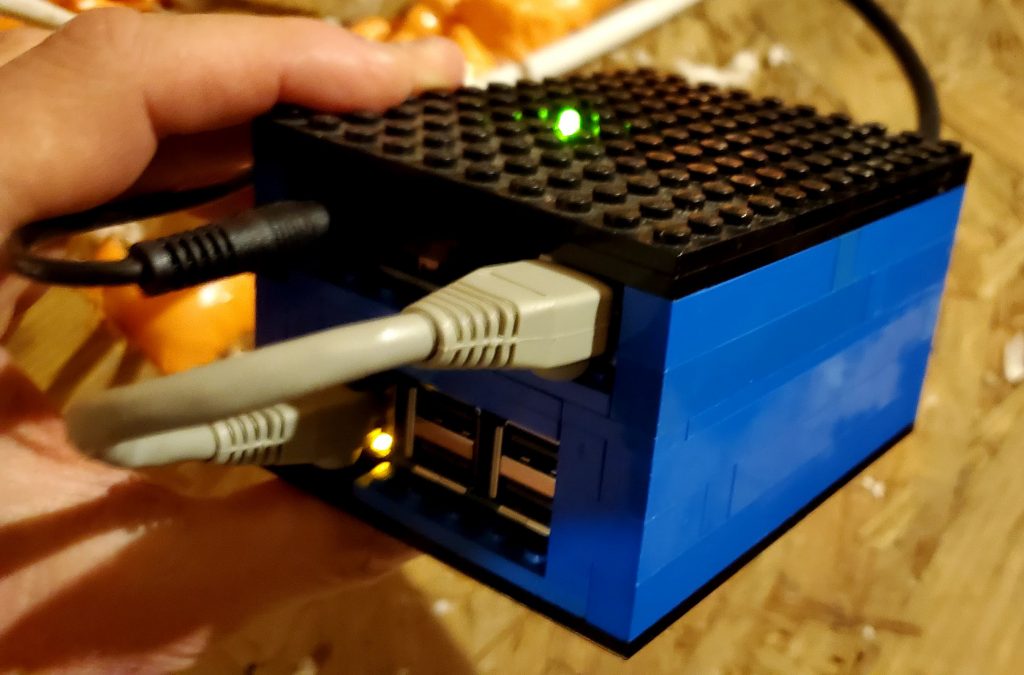
Fun LEGO case holding the Pi, DAC/AMP, and PoE boards (in the attic)

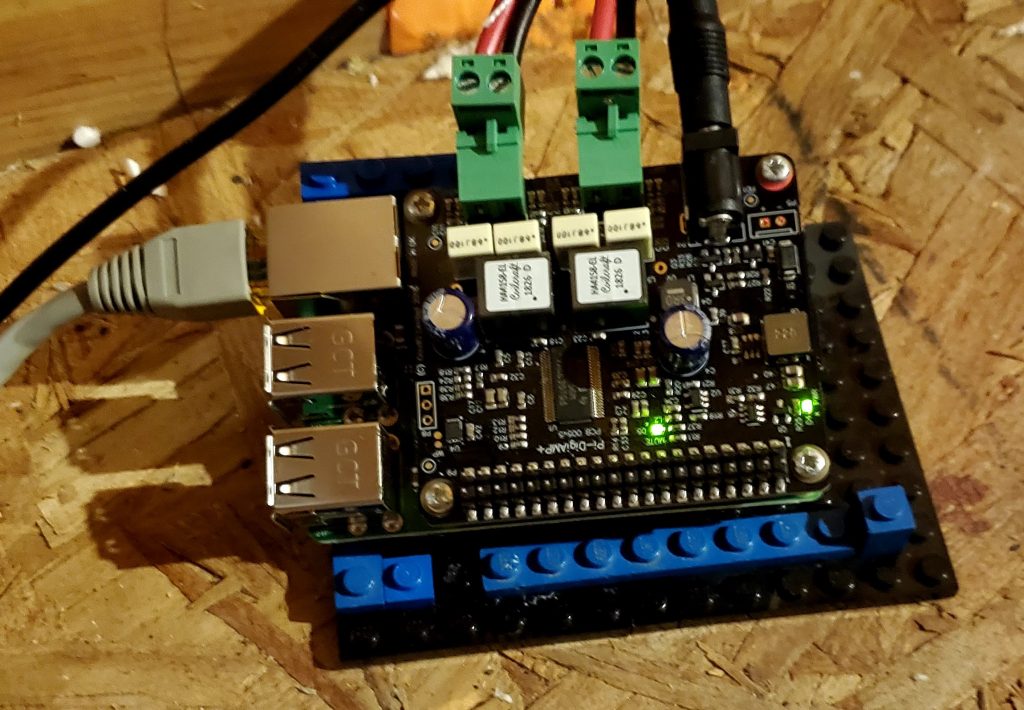
I used the following components:

The $236 cost was lower priced for better quality than pre-existing devices I considered, with the major expenses being:

  • $35 for the Raspberry Pi
  • ~$65 (converted from UK Pounds) for the Pi-DigiAmp+
  • $36 for the POE-161S PoE splitter
  • $100 for the pair of speakers
  • (I already had the cable)

The general assembly steps are:

  • Connect the IQaudIO Pi-DigiAmp+ to the Raspberry Pi SBC following IQaudIO’s directions.
  • Optional: Remove the internals of the PLANET POE-161S PoE splitter and put it in a custom case along with the Raspberry Pi SBC and the Pi-DigiAmp+ board.
    • I didn’t find a good way to connect the PoE board to the other boards, so I put an insulator between them and made a case out of LEGO bricks to hold all three components.
  • Run Cat6A ethernet cable from a 802.3at PoE switch or PoE injector to the PLANET POE-161S PoE splitter – but don’t connect it yet (until the speakers are connected)!
    • Make sure to use a 803.3at PoE+ switch or injector (or better) since the Pi-DigiAmp+ needs the 25.5W of power (but don’t max the volume output or the Pi will reboot due to lack of enough power – 75% seems okay).
    • The Pi-DigiAmp+ can actually use 2*40W of power for the amplified speaker output, so a newer 802.3bt Type 3 (55 W) or Type 4 (up to 90-100 W) switch/injector and splitter would be better – but they cost much more currently.
  • Connect the PoE splitter
    • Set the PoE splitter for 12V output (which the Pi-DigiAmp+ expects as input)
    • Connect the PoE splitter’s power output to the Pi-DigiAmp+ (NOT the Raspberry Pi SBC, since the Pi-DigiAmp+ will pass power to the Raspberry Pi SBC)
    • Connect the PoE splitter’s ethernet output the the Raspberry Pi’s ethernet input.
  • Install the speakers and connect the speaker outputs of the Pi-DigiAmp+ to the speakers.
  • Install Raspbian to an SD card and install it into the Pi.
  • Plug the Cat6A cable into the PoE switch or injector – the device should boot up!
Raspberry Pi 3 B+, IQaudIO Pi-DigiAmp+ DAC/AMP, and cables (in the attic)

Now configure the device to act as a network speaker:

  • Install and configure PulseAudio. Run it in system mode, and copy the auth key to any device you want to play audio from via PulseAudio clients
  • To support AirPlay from iOS devices, install and configure Shairport-Sync.
  • Configure the firewall to allow the appropriate ports from your network.
Installed speakers

Now test and use your new network speakers! We’ve found many uses for the device, including:

  • Playing music and radio broadcasts (like the news) audible from the whole upstairs (and even downstairs).
  • Our smart doorbell triggers playback of a doorbell audio file, replacing the old traditional doorbell.
  • Integrating it into the home security system, playing loud alarms and other sounds when needed.

2016/10/05

Home Automation Improvements!

Filed under: — Stormwind @ 9:47 am

lvm

I went on a home automation improvement kick recently! The changes include:

OpenHAB – I switched from Misterhouse to OpenHAB for home automation. Why? OpenHAB has a cleaner codebase, more active development community, more efficient event-driven model, increasing device support, a better UI, charting, and a functional mobile client. I completed most of the conversion in a few hours, and further lingering issues within few days.

WeeWX – instead of WView for my weather station. WeeWX uses the same DB format as WView so all the historical data is still present. WeeWX has a more active development community, lacks a rainfall bug that was plaguing me in WView, and supports MQTT (see below) allowing me to get weather station data from WeeWX to OpenHAB.

MQTT – an IoT (Internet of Things – another buzzword) message bus becoming more common in home automation. It allows publishing of data and subscription to data channels, decoupling devices enough to make it easier to connect devices lacking explicit support for each other.

DoorBird – a video intercom, motion-sensing doorbell with a documented local (non-cloud) API and hard-wired power (no batteries to worry about). I integrated it into my OpenHAB instance – here are example instructions.

Garage door automation – I added garage door controllers and sensors, so now when I ask “did I remember to close the garage door?” after driving 30 (or 300) miles I can check, and close it if I did forget.

More intelligence – Decorative lights come on at dusk instead of a fixed time, adapting to the season automatically. The container herb garden on the back porch skips drip irrigation if it has rained more than 0.2 inches in the last 24 hours. A reminder is pushed to our phones if the garage door has been left open for more than 30 minutes. If motion is detected on the front porch, a photo is taken by the doorbell camera and archived.

Whew! I have a few more ideas too, but I better wait a little bit and have a burn in period before making more changes – and trying OpenHAB 2.0.

2012/03/22

How to Quiet a Garage Door and Opener

Filed under: — Stormwind @ 5:18 pm

GarageDoorOpenerOne of our garage door openers died of old age recently – it was an old builder-model (in other words, as cheap as the builder can get) chain drive opener that was incredibly noisy. I took advantage of the opportunity to reduce the noise made by the garage door opener and the door itself especially since there is a room of the house above the garage.
Here’s what I did in order of increasing cost and effort:

  1. Oil the hinges, springs, pulley bolts, etc of the door. I used standard household oil (don’t use WD-40, it is technically not a lubricant). Don’t mess with the springs – it is dangerous, only trained technicians should adjust springs. (more info)
  2. Replace metal door rollers with nylon rollers. I bought two 10-packs of these nylon rulers.
  3. Install vibration isolators between the garage door opener and the ceiling. I used the RSIC-GDS Motor Kit from PAC International.
  4. Replace the noisy garage door opener with a quiet opener. I bought a Sommer Direct Drive garage door opener which is very quiet. I’ve also read good things about the LiftMaster 3800 Residential Jackshaft Opener.

After making all of the above changes, we believe the garage doors are about 75% quieter than before!

Hope this helps someone!

2012/01/08

Fedora 16 Upgrade

Filed under: — Stormwind @ 2:24 pm

I upgraded our server to Fedora 16 from Fedora 14 recently, so I thought I’d continue my tradition of posting the solutions to the problems I encountered to help others.

Two major changes in Fedora recently increased the difficulty of this upgrade: the switch to grub2 from the grub legacy bootloader, and the switch to systemd from Upstart and SysV-style init.

I used the PreUpgrade method once again to reduce downtime and avoid burning a disc.

References to read first:

  1. How to use PreUpgrade
  2. Common Fedora 16 bugs

(more…)

2010/12/29

Styrofoam recycling in Austin

Filed under: — Stormwind @ 10:22 am

Melissa from Hunters Chase pointed out that Cycled Plastics in Austin recycles foam products, which are not taken and recycled as part of the single stream recycling from the City of Austin and Texas Disposal Services.

From their website at http://www.cycledplastics.com/Services.html :

Public Drop Off Site: Cycled Plastics maintains a public drop point at it’s facility in Austin (at 10200 McKalla Place). The following items are accepted Monday through Friday, 7am – 5pm. (click here for a map)

  • Packaging Foams free of dirt or food contamination (EPS #6, PP #5, LDPE #4)
  • #2 HDPE curbside bottles that have been rinsed with caps removed
  • #1 PET curbside bottles that have been rinsed with the caps removed
  • #2 HDPE flower pots that have been lightly washed to remove most of the dirt
  • #4 LDPE bags that have had no food contact and have no paper contamination (labels, stickers)

2010/10/23

Chevy Volt test drive

Filed under: — Stormwind @ 11:34 am

At the Chevy Volt test drive, waiting in line…

2010/10/05

John Avlon – Voters should fire hyper-partisans

Filed under: — Stormwind @ 12:03 pm

Another good opinion article on CNN, this one by John Avlon advocating voters rejecting hyper-partisan candidates.

via Voters should fire Bachmann, Grayson – CNN.com.

A great quote:  “We need to stand up to the extremes on both sides to stop the cycle of incitement before it gets even uglier.”

2010/10/04

David Frum – We’re not on a ‘road to serfdom’

Filed under: — Stormwind @ 5:35 pm

I try not to define myself as liberal or conservative – but some of the fear-mongering and end-of-the-world fatalism being used in this election cycle is inappropriate and ultimately destructive, rather than constructive and adding value to the debate.

David Frum has a good opinion article on CNN about it –

We’re not on a ‘road to serfdom’ – CNN.com.

2010/06/12

Our Home Efficiency Improvements

Filed under: — Stormwind @ 8:50 pm

Lisa and I recently went on the Austin Cool House Tour co-sponsored by the Texas Solar Energy Society and Austin Energy Green  Building.

We realized the efficiency retrofits to our home were pretty similar to what we saw on the tour, so for fun I thought I’d write up the green feature list of our house in the same format as used by the tour book.

Home Solar Plant - Small

Spangler Home – Northwest Austin

Built as a traditional non-green building, this Austin home has been retrofitted for energy efficiency and simple but high-tech living.

Owners: Lisa and Jason Spangler
Solar PV: Texas Solar Power Company

Green Features

  1. 10KW grid-tied solar photovoltaic array (by Texas Solar Power Company)
  2. Whole-home energy monitor (TED 5000).
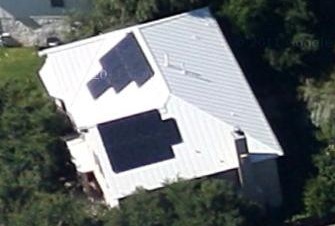
  3. White reflective metal roof (Sheffield Metals CoolR Solar White Galvalume – Reflectivity 0.68, Emissivity 0.85, SRI 82, 25% recycled content, 100% recyclable – installed by Southwest Metal Roofing Systems).
  4. Level 2 EVSE (electric vehicle car charger) and a Chevy Volt range-extended electric car
  5. Lawn replaced with native plant and prairie garden which requires almost no supplemental watering.  Crushed granite and limestone paths allow water penetration.  Mature trees provide shade.
  6. R-38 insulation in attic with R-8 ductwork.  R-9 garage door insulation.
  7. 1 gpm low-flow showerheads (from New Braunfels-based Bricor).  Shut-off values on showers for optional Navy shower.
  8. Solar screens on all windows.
  9. Energy Star appliances from the highest CEE efficiency tier (dishwasher, refrigerator, clothes washer and dryer).  Energy Star electronics.
  10. 19 SEER multi-zoned HVAC system with variable speed motor and fan coils, and programmable thermostats.
  11. All lighting is CFL or LED.  (LED fishtank and main kitchen lighting reduces energy usage of most-used lights.)
  12. High efficiency aerodynamic ceiling fans with timed remotes throughout.  (Gossamer Wind fans)
  13. Masonry and fiber cement siding  and trim (Hardiboard).
  14. Ethernet networking (Cat6) and high speed Internet connection enables telecommuting to save energy and reduce emissions.  Energy-efficient computers. Notebook and Home theater systems that sleep when not in use.
  15. Weather station (Davis Vantage Pro2 Plus)
  16. Easy access to transportation – bike lanes, public transportation (bus stop 0.4 miles away), two light rail stations nearby (4.0 and 5.2 miles).

Any other ideas for increasing energy efficiency or going more green?  Leave the in the comments!

Update: Here is an aerial photo of the metal roof and solar panels from Google Maps:

Previous Posts

|| RSS 2.0 || Comments RSS 2.0 || XHTML || Powered by WordPress ||