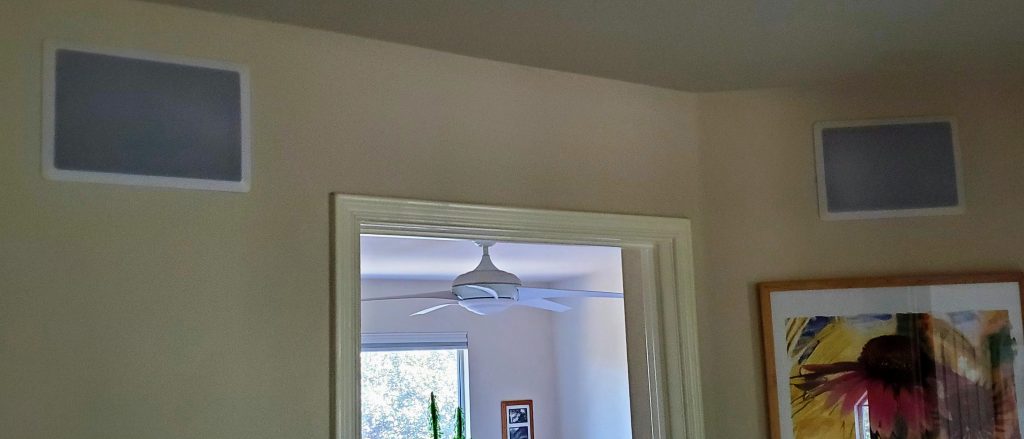
I recently built a networked PoE (Power over Ethernet) speaker system and installed it in the wall at the top of the stairs. By using PoE, I only had to run one cable to the device – a Cat6A ethernet cable that provided data and power.
I used the following components:
- Raspberry Pi 3 B+ or newer SBC (single board computer)
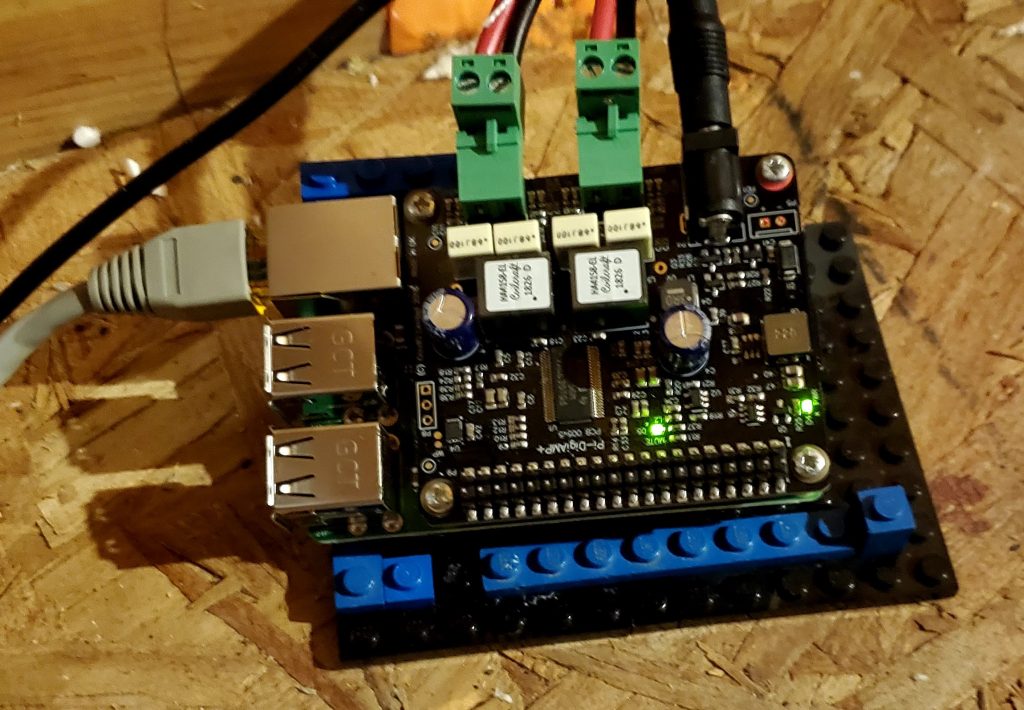
- IQaudIO Pi-DigiAmp+ DAC/AMP
- PLANET POE-161S IEEE 802.3at Gigabit High PoE (Power over Ethernet) Splitter
- (Note: Raspberry Pi PoE hats don’t provide enough power, hence the use of the external splitter)
- Monoprice Caliber 8in Fiber In-Wall Speakers 3-Way (pair)
- Speaker wire
- Cat6A ethernet cable
The $236 cost was lower priced for better quality than pre-existing devices I considered, with the major expenses being:
- $35 for the Raspberry Pi
- ~$65 (converted from UK Pounds) for the Pi-DigiAmp+
- $36 for the POE-161S PoE splitter
- $100 for the pair of speakers
- (I already had the cable)
The general assembly steps are:
- Connect the IQaudIO Pi-DigiAmp+ to the Raspberry Pi SBC following IQaudIO’s directions.
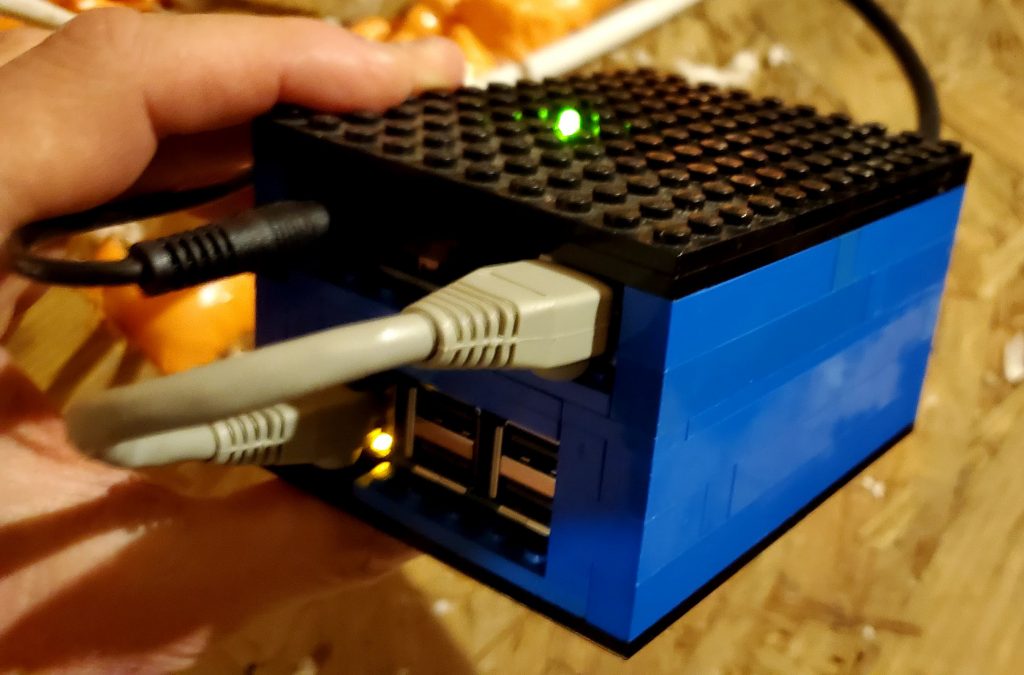
- Optional: Remove the internals of the PLANET POE-161S PoE splitter and put it in a custom case along with the Raspberry Pi SBC and the Pi-DigiAmp+ board.
- I didn’t find a good way to connect the PoE board to the other boards, so I put an insulator between them and made a case out of LEGO bricks to hold all three components.
- Run Cat6A ethernet cable from a 802.3at PoE switch or PoE injector to the PLANET POE-161S PoE splitter – but don’t connect it yet (until the speakers are connected)!
- Make sure to use a 803.3at PoE+ switch or injector (or better) since the Pi-DigiAmp+ needs the 25.5W of power (but don’t max the volume output or the Pi will reboot due to lack of enough power – 75% seems okay).
- The Pi-DigiAmp+ can actually use 2*40W of power for the amplified speaker output, so a newer 802.3bt Type 3 (55 W) or Type 4 (up to 90-100 W) switch/injector and splitter would be better – but they cost much more currently.
- Connect the PoE splitter
- Set the PoE splitter for 12V output (which the Pi-DigiAmp+ expects as input)
- Connect the PoE splitter’s power output to the Pi-DigiAmp+ (NOT the Raspberry Pi SBC, since the Pi-DigiAmp+ will pass power to the Raspberry Pi SBC)
- Connect the PoE splitter’s ethernet output the the Raspberry Pi’s ethernet input.
- Install the speakers and connect the speaker outputs of the Pi-DigiAmp+ to the speakers.
- Install Raspbian to an SD card and install it into the Pi.
- Plug the Cat6A cable into the PoE switch or injector – the device should boot up!
Now configure the device to act as a network speaker:
- Install and configure PulseAudio. Run it in system mode, and copy the auth key to any device you want to play audio from via PulseAudio clients
- To support AirPlay from iOS devices, install and configure Shairport-Sync.
- Configure the firewall to allow the appropriate ports from your network.
Now test and use your new network speakers! We’ve found many uses for the device, including:
- Playing music and radio broadcasts (like the news) audible from the whole upstairs (and even downstairs).
- Our smart doorbell triggers playback of a doorbell audio file, replacing the old traditional doorbell.
- Integrating it into the home security system, playing loud alarms and other sounds when needed.
